


Setting Up Solar Charge Controller to the Solar Panel: Materials Needed and Steps
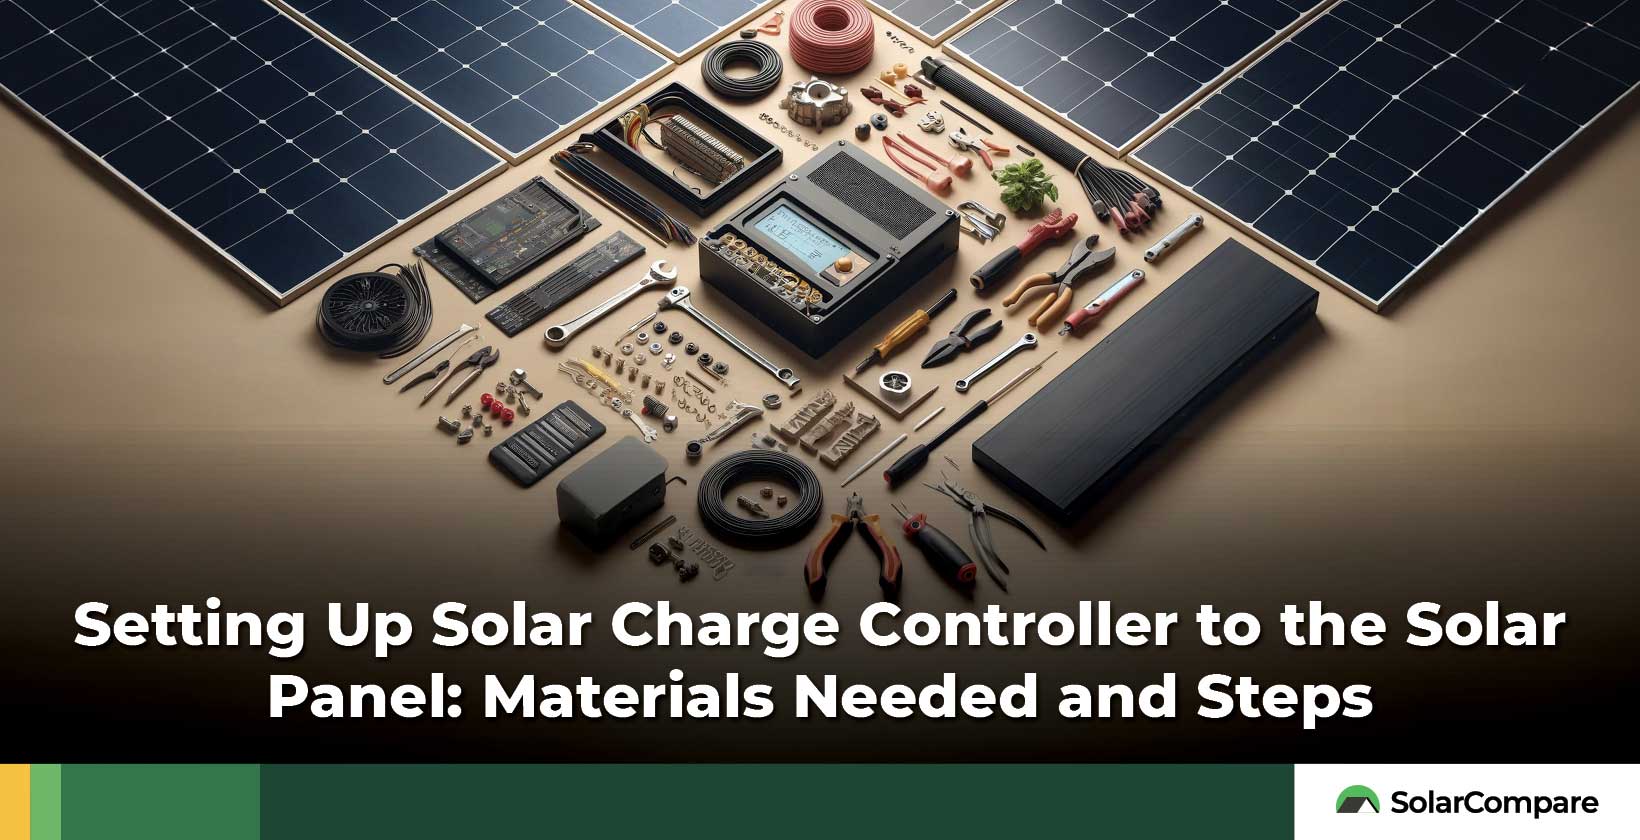
To set up a solar charge controller for your solar panels, you need some essential items, including photovoltaic (PV) panels, a solar battery, and a solar inverter. Combined with the solar charge controller, these materials help prevent your solar battery from being damaged due to electrical surges, which reduces its lifespan. Solar charge controllers regulate the voltage and current from solar panels, ensuring that the batteries do not overcharge. The photovoltaic (PV) panel converts sunlight into electricity. The battery stores the electricity generated by the solar panels for use when needed. The inverter converts the direct current (DC) electricity generated by the solar panels and stored in the battery into alternating current (AC) electricity used by most household appliances.
Connecting a solar charge controller to the solar panel is an excellent way to ensure that the voltage and current are regulated, preventing overcharging and ensuring the longevity of your solar batteries. Multi-Contact 4mm (MC4) solar adapter cables, which are specialized electrical connectors, are used to establish safe, secure, and weatherproof connections between photovoltaic (PV) panels, batteries, and other components in a photovoltaic (PV) system.
There are a number of crucial steps involved with connecting a solar charge controller to a PV system.
- Connect the Battery and the Solar Charge Controller: Match the positive and negative terminals to connect the battery to the solar charge controller, regulating voltage and preventing overcharging.
- Connect MC4 Solar Adapter Cables to the Solar Panel: Use MC4 connectors to create secure, weatherproof connections between solar panels, batteries, and other components, ensuring stability over time.
- Connect the Solar Charge Controller to the Solar Panel: Link the solar panels to the solar charge controller to regulate voltage and current flow to the batteries, ensuring proper charging and preventing overcharging.
- Check the Connection: Verify all connections, including solar panels, charge controller, and battery, are secure with correct polarity and no damage for optimal system operation and safety.
Once set up correctly, solar charge controllers are relatively easy to maintain. Maintaining a solar charge controller involves keeping it clean, checking and securing wiring, monitoring battery charging, adjusting controller settings, and monitoring system performance.
What are the basic materials needed to Set Up a Solar Charge Controller for a Solar Panel?
Setting up a solar charge controller for your solar panel systems requires several key materials. These four main materials, combined with the solar charge controller, regulate the electrical currents. This current regulation prevents the battery from being damaged due to electrical surges, which is likely to reduce its lifespan.
The four basic materials needed to set up a solar charge controller for the solar panel are below.
- Solar Charge Controller: The solar charge controller regulates the voltage and current coming from the solar panels, ensuring that the batteries do not overcharge.
- Solar Panel: The photovoltaic (PV) panel converts sunlight into electricity. The size and number of panels you need depend on the amount of sunlight your location receives and the power requirements of your system.
- Battery: The battery stores the electricity generated by the solar panels for use when needed. The type and size of the battery depend on your energy needs.
- Inverter: The inverter converts the direct current (DC) electricity generated by the solar panels and stores it in the battery into alternating current (AC) electricity, which is used by most household appliances.
More information about the four basic materials required for setting up solar controllers within a photovoltaic (PV) system is below.
1. Solar Charge Controller
A solar charge controller is a crucial component in any solar energy system that keeps the battery from overcharging. Solar charge controllers regulate the voltage and current between the photovoltaic (PV) solar panels and the battery, ensuring that the battery remains in a consistent state of charge. Since solar panels produce different amounts of electricity depending on factors such as weather conditions, the charge controller ensures that excess power doesn’t damage the batteries. Without a solar charge controller, a solar-powered system wouldn’t be able to function optimally, and the batteries would quickly degrade.
Solar charge controllers protect the appliances that are connected to the batteries in photovoltaic (PV) solar systems. Most batteries hardly recover after overcharging and over-discharging. Solar charge controllers are essential current/voltage regulators to help prolong the service life of the batteries.
2. Solar Panel
A solar panel, known as a photovoltaic (PV) panel, is a component of a photovoltaic system made from a series of photovoltaic cells arranged to generate electricity using sunlight. The main component of a solar panel is a solar cell, which converts the energy generated from sunlight into usable electrical energy. The most common form of solar panels involves crystalline silicon-type solar cells.
Solar panels are the most essential part of a solar power system since they produce electricity that eventually finds its way to your home appliances such as laptops, lights, and televisions. Photovoltaic (PV) panels convert sunlight into electricity through the photovoltaic effect. Solar panels only capture at most a quarter of the sun’s energy hitting them and convert it into electricity. This makes solar panels crucial in the transition to clean, renewable power.
3. Battery
A solar battery is an electrical accumulator that stores the electrical energy generated by a photovoltaic panel in a solar energy installation. A solar panel battery is a device that is added to your solar power system to enable the system to run effectively even during the night or on cloudy days, storing excess electricity produced by the panels. That excess energy is used to power your home at times when your solar panels do not generate enough electricity, including at night, on cloudy days, or during power outages.
Solar batteries are crucial for maximizing the effectiveness of solar power systems. They store excess electricity produced by solar panels so it is used at the homeowner’s convenience later on. That excess energy is used to power your home at times when your solar panels do not generate enough electricity, including at night, on cloudy days, or during power outages. This function allows solar panels, which famously only produce electricity when the sun is shining, to provide round-the-clock clean energy effectively. Solar batteries are an alternative (or addition to) feeding energy back to the grid. They help you make your house or facility somewhat immune from power outages and even help take it off-grid entirely.
4. Inverter
An inverter is a power electronic device or circuitry that changes direct current (DC) to alternating current (AC). The input voltage, output voltage and frequency, and overall power handling depend on the design of the specific device or circuitry. The inverter does not produce any power; the power is provided by the direct current (DC) source. DC flows in one direction while AC reverses direction periodically. This allows the electricity stored in the battery to move in one direction while the AC supply is used to power homes and businesses.
Inverters play a critical role in modern electrical systems, bridging the gap between DC power sources and AC appliances. They are primarily used in electrical power applications with high currents and voltages. In the context of a solar power system, an inverter is one of the basic materials. It converts the DC electricity, which is what a solar panel generates, to AC electricity, which the electrical grid and most household appliances use. Without a solar panel inverter, the DC power generated by solar panels is not usable in most home appliances.
What are the Steps to Connect a Solar Charge Controller to the Solar Panel?
Connecting a solar charge controller to the solar panel requires several steps to ensure that the voltage and current are regulated. Correct regulation of the flow of energy within a photovoltaic (PV) system prevents overcharging and ensures the longevity of your solar batteries.
The four main steps to connect a solar charge controller to a solar panel are listed below.
- The Battery and the Solar Charge Controller should be connected: Connecting the Battery and the Solar Charge Controller is the first step when connecting a solar charge controller to a solar panel. When connecting the battery to the solar charge controller, ensure that the positive and negative terminals match correctly. This ensures the voltage and currents are properly regulated, which prevents overcharging.
- MC4 Solar Adapter Cables should be connected to the Solar Panel: Connecting the MC4 adapter cables to the solar panel is the second step when connecting a solar charge controller to a photovoltaic (PV) panel. Locate the MC4 connectors at the ends of your solar panel’s cables. Connect the MC4 inline fuse and positive solar adapter cable to the positive solar panel cable. Connect the negative solar adapter cable to the negative solar cable. This ensures efficient power generation through a reliable and weather-resistant means of linking solar panel modules.
- The Solar Charge Controller should be connected to the Solar Panel: Connecting the solar charge controller to the solar panel is the third step when connecting a solar charge controller to a solar panel. Connect the negative solar cable to the “-” solar terminal on the charge controller. Connect the positive solar cable to the “+” solar terminal. This ensures that solar panel batteries do not discharge or overcharge.
- Check the Connection: Finally, double-check all connections to ensure they are secure and correct. Make sure the system is working properly before leaving it unattended.
1. The Battery and the Solar Charge Controller should be connected
Connecting the battery and the solar charge controller is a crucial step in setting up a solar power system. This process involves attaching the battery to the controller and ensuring the positive and negative terminals are correctly matched. The controller then regulates the voltage and current flowing from the solar panels to the batteries to ensure proper charging and prevent battery damage through overcharging.
The connection between the battery and the solar charge controller is vital for the efficient operation of a solar power system. The controller acts as a regulator, managing the power flow between the solar panels and the battery. It ensures that the batteries aren’t overcharged during the day and limits the amount of reverse current at night. Overcharging the battery increases the temperature as it tries to than it is capable of, leading to faster aging of the battery, decreased capacity, or explosion in the worst-case scenario. Connecting a solar charge controller to a solar panel prolongs the batteries’ performance and lifespan by regulating the voltage and current emanating from the solar panels.
Safety is paramount when connecting the battery and the solar charge controller. Always disconnect all power sources before starting the connection. When connecting the battery cables to the battery terminals, connect the negative (black wire) first, then the positive. This helps prevent accidental short circuits that occur if the positive wire touches any metal parts of the system. Ensure all the essential materials are safely disconnected from power sources while working.
The solar charge controller acts as a safety barrier between the panels and the battery and should be a part of every home solar panel installation. It lowers the voltage of panels down to the level of the battery. The solar charge controller stops the battery from being in a deep discharge state. Regular deep discharge of a battery lowers the number of charge cycles a battery is able to survive. The solar charge controller blocks reverse currents. At night, electricity flows back to panels from the battery, which leads to temperature rises and fires in the photovoltaic (PV) modules. The controller allows monitoring of the state of the panels and the battery.
2. MC4 Solar Adapter Cables should be connected to the Solar Panel
Multi-Contact 4mm (MC4) solar adapter cables are specialized electrical connectors designed specifically for solar panel systems. They are used to establish safe, secure, and weatherproof connections between photovoltaic (PV) panels, batteries, and other components in a photovoltaic (PV) system. MC4 connectors are designed to withstand harsh weather conditions such as extreme temperatures, snow, and rain. MC4 connectors have a locking mechanism that prevents accidental disconnections, ensuring that your connections are stable throughout the lifespan of your photovoltaic (PV) panel system. MC4 connectors handle high currents and voltages properly, significantly contributing to their safety and efficiency. When you connect MC4 Solar Adapter Cables to the Solar Panel, you’re essentially linking the solar panels to the rest of the solar power system.
The components of the MC4 solar adapter cable include the male and female connectors, the housing, the locking mechanism, the sealing gasket, and the contact material. The male and female connectors come in two pairs. While the male connector usually has a metal pin, the female connector has a metal socket, forming a tight electrical connection when connected. The housing is usually a durable plastic metal, which provides adequate protection from the element and ensures the longevity of the connections. The housing is suitable for long-term use because it is typically made from UV-resistant and flame-retardant material, such as PPO (Polyphenylene Oxide) or PA (Polyamide). The built-in locking mechanism is another essential component of the MC4 connectors and prevents them from being accidentally disconnected. The sealing gasket is a rubber gasket used to create a watertight seal between the male and female connectors. The sealing gasket ensures that no moisture or dirt finds its way into the connection. The contact materials are typically made from copper, with a tin or silver plating, to enhance their conductivity and corrosion resistance.
MC4 connectors stand out for their reliability, durability, and ease of connection, making them an indispensable choice for solar installations. MC4 solar adapter cables are designed to ensure a tight and secure connection, minimizing the risk of disconnection or power loss. They are the only certified and authorized cable options to be used in solar panel installation. All modern solar panels use the MC4 solar connectors.
MC4 connectors are designed to make hooking up your solar panels simple and fast. When preinstalled on cables, avoid the need to strip and crimp your wires. Push and snap the male and female ends together. MC4 solar adapter cables meet the requirements of the National Electric Code, and they’re UL-certified and the preferred connection method of electrical inspectors. The UL6703 standard for PV connectors states that connectors have to be of the same type and brand to avoid cross-mating dangers. Due to the locking mechanism of the MC4 connectors, they will not come unplugged and are well-suited for outdoor environments. The connectors are separated, but this requires a special MC4 unlocking tool.
3. The Solar Charge Controller should be connected to the Solar Panel
Connecting the Solar Charge Controller to the Photovoltaic (PV) panel is a process where the solar panels are linked to the solar charge controller. The charge controller then regulates the voltage and current flowing from the solar panels to the batteries to ensure proper charging and prevent battery damage through overcharging.
The connection between the solar panels and the solar charge controller is key for the efficient operation of a solar power system. The controller acts as a regulator, managing the power flow between the solar panels and the battery. The solar charge controller ensures that the batteries aren’t overcharged during the day and limits the amount of reverse current at night. This prolongs the batteries’ performance and lifespan by regulating the voltage and current emanating from the solar panels.
4. Check the Connection
Checking the connection in a solar panel setup involves verifying that all components of the system, including the solar panels, charge controller, and battery, are properly connected. This includes ensuring that all wires are securely attached, the polarity is correct (positive to positive, negative to negative), and there are no loose or damaged connections.
Checking the connection is a crucial step in the installation and maintenance of a solar power system. It ensures that the system is set up correctly and safely, which is essential for the system to operate efficiently and effectively. An adequately connected system maximizes the return on investment in solar power.
Solar panels, charge controllers, batteries, and inverters need regular checks to ensure they’re operating optimally. Knowing how to check if the solar panel is charging the battery helps prevent unexpected power failures and costly replacements. Regular checks help identify potential issues early, allowing for timely repairs and preventing more significant problems down the line. Checking the connection of your solar panels and solar charge controller is essential after installation and an important part of ongoing system maintenance.
What are the things to consider when setting up a solar charge controller?
When setting up a solar charge controller, there are several key factors to consider. One of the most important considerations is to correctly match the system voltage to the battery voltage and battery type. Another crucial consideration is making sure the battery is the first thing to be connected to the solar charge controller. Other considerations include the maximum system current, charge controller capacity, charge controller settings for different battery types, installation location, wiring, fuses, and circuit breakers.
The system voltage is one of the crucial things to consider when setting up a solar charge controller. This is because your system voltage is the same as your battery voltage in most cases. The common system voltage levels are 12V, 24V, or 48V. You must consider your system voltage because your solar charge controller must be able to handle the maximum voltage generated by the photovoltaic (PV) panel when it's operating at its optimal power output. The first step is to identify the voltage of your battery or battery bank. Next, you need to ensure that your solar panels are able to generate a voltage equal to or higher than your system voltage when they are operating at their maximum power point (MPP). Finally, you need to choose a charge controller that is able to handle the maximum voltage generated by your PV panel.
The maximum system current is the peak output current your solar panels or array produces. Essentially, it’s the maximum power your system provides during the most effective solar energy periods, ensuring that your solar power system is not overcharged.
The charge controller capacity is the highest current level that your solar charge controller safely manages. This capacity typically dictates the rating of your solar charge controller and ranges from 10A up to 100A(ampere), protecting your batteries from being overcharged by solar PV arrays/modules during the day.
Another important factor to consider when setting up your solar charge controller is the charge controller settings for different battery types. Knowing how to configure the solar charger controller settings according to your specific solar battery type for an effective solar energy system significantly enhances the charging efficiency of your solar batteries.
Another important factor to consider when setting up your solar charge controller is the location of installation. Install the charge controller in a well-ventilated area away from direct sunlight and extreme temperatures. The best location for the solar charge controller is as close to the battery bank as possible. A dedicated power utility room or the garage near the electrical distribution panel is ideal.
Following the manufacturer’s instructions for proper wiring and ensuring secure connections is important. The wires and cable from the solar charge controller to the battery should be kept short. The cables and wires must have sufficient cross-section to avoid voltage drop. When a voltage drop occurs, it wastes power by heating up the cables, preventing the solar charge controller from sensing the battery voltage correctly.
Install appropriate fuses or circuit breakers to protect the charge controller and wiring from overcurrent. Appropriate use of fuses and circuit breakers helps protect the solar power system wiring from getting too hot and catching fire.
As for safety, solar charge controllers are generally safe to use around children, but they should be installed in a location that is out of reach of young children to prevent tampering. Always ensure that the system is properly grounded to avoid electrical shocks. Regularly inspect your system for any signs of damage or wear and tear. Consult with a professional solar installer if you have any safety concerns.
How do you maintain a Solar Charge Controller?
To maintain your solar charge controller, check the wiring and connections at all times to ensure that your connections are safe, secure, and corrosion-free. Monitor the battery charging to ensure that they are well-charged to avoid overcharging. Check the controller settings to ensure that they are properly configured in line with your specific solar charging and battery specifications. Monitor the system performance through the indicators to prevent the batteries from overheating.
Let’s go through the step-by-step tasks required to perform a solar charge controller maintenance inspection.
First, inspect the wiring and connections regularly to ensure they are secure and corrosion-free. Loose connections are likely to cause electrical resistance and heating, which damages the controller. Next, ensure that the batteries are well-maintained and charged correctly. Overcharging or undercharging tends to reduce battery life and efficiency. Then, periodically check the setup and configuration settings of the solar charge controller to optimize its performance. Then, adjust the settings according to the specific solar battery type for an effective solar energy system. Some controllers come with an LCD that notifies you of any issues that require attention. Finally, the system performance should be regularly monitored to identify and address any potential problems early.
Can you Set Up a Solar Charge Controller for the Solar Panel alone?
Yes, it is possible to set up a solar charge controller for the solar panel alone. First, connect the solar panel to the charge controller, ensuring the positive wire is connected to the positive terminal of the charge controller and the negative wire is connected to the negative terminal. Next, connect the MC4 solar adapter cables to the solar panel, ensuring that the MC4 inline fuse and positive solar adapter cable are rightly affixed to the positive solar panel cable. Connect the negative solar adapter cable to the negative solar cable. Then, connect the solar charge controller to the solar panel according to the specifications of your solar panel and battery. Finally, check the connection through the indicators to monitor the system performance.
Is it easy to Set Up a Solar Charge Controller for the Solar Panel?
Yes, it is easy to set up a solar charge controller for the solar panel if you understand electrical systems and safety precautions. The actual process of connecting the solar panel to the charge controller involves simple electrical connections. This typically involves connecting the positive and negative wires from the solar panel to the corresponding terminals on the charge controller. Most solar charge controllers come with clear instructions on how to connect them to the solar panels and batteries. These instructions usually include diagrams that show where each wire should be connected.