


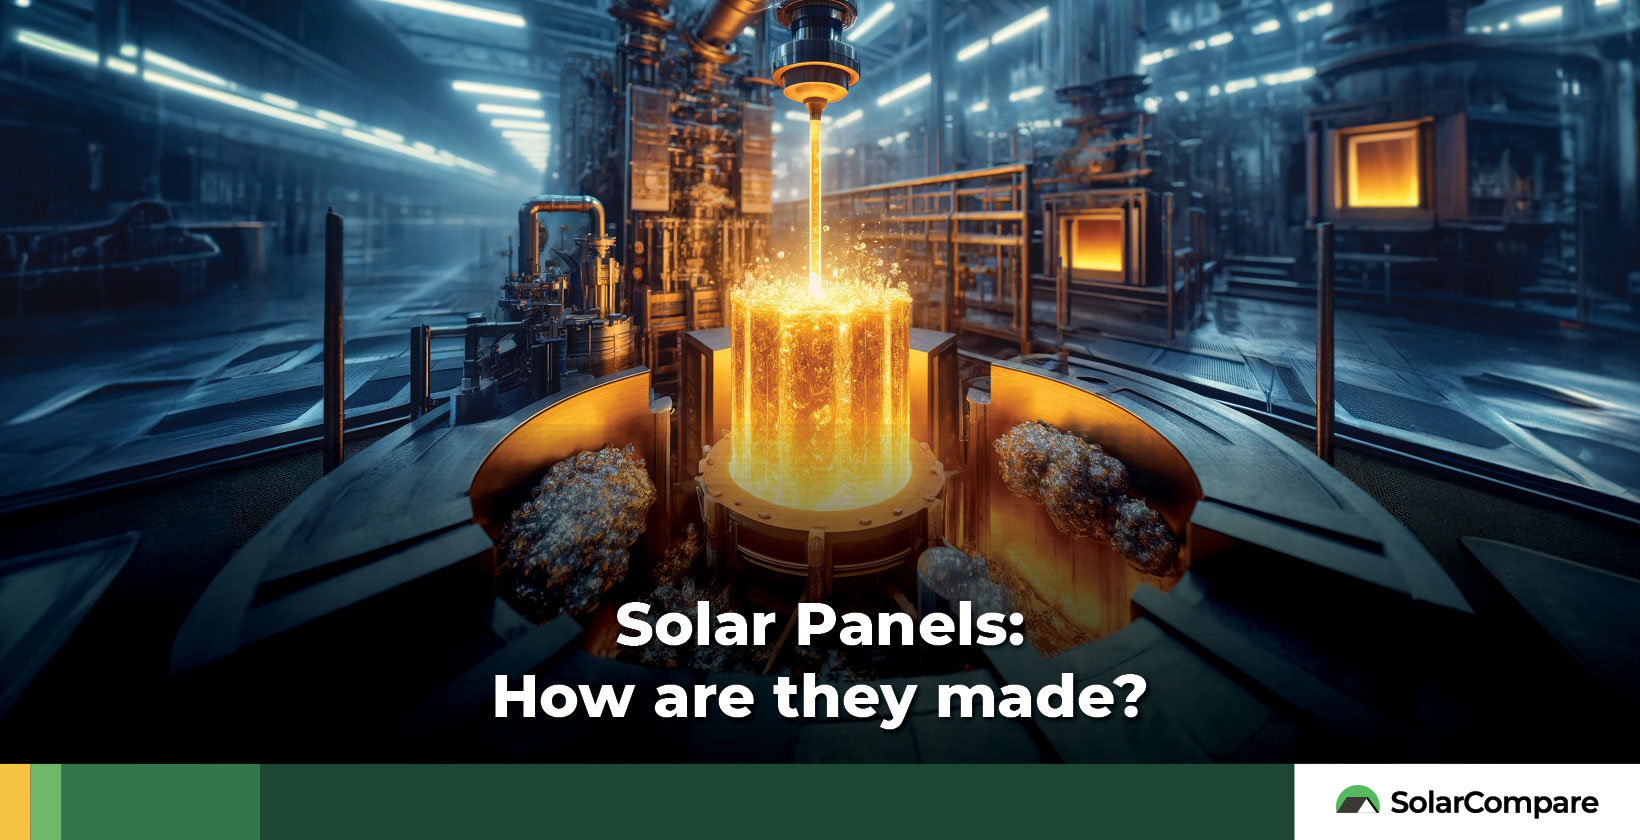
Solar panels are relatively complex devices designed to harness the sun's energy as a renewable energy source. The process of making a solar panel starts with the right materials, which typically include silicon cells, metal framing, glass casing, and wiring. One of the most important solar panel materials is the choice of semiconductor material used for the solar cells within each panel.
Silicon is a highly efficient semiconductor and serves as the foundational element for both monocrystalline and polycrystalline cells, which are the most common for residential and commercial applications. Silicon is the second most abundant element on earth, but the process of procuring and refining the raw silicon required to make solar panels is complex. Buying solar cells ready-made is recommended if attempting to make your own solar panel.
Other parts needed to make a solar panel include metal framing, which is typically composed of aluminum to provide durability and strength. Glass casing shields the silicon cells from external damage while allowing sunlight to pass through, and the wiring connects the cells to form a cohesive system capable of generating electricity.
Though buying materials to make solar panels is typically costly at first, the long-term savings on energy bills and the positive environmental impact motivate people to create DIY solar panels. Self-built solar panels allow people to reduce their reliance on traditional energy sources while ultimately achieving energy self-sufficiency. Constructing DIY solar panels enables individuals to harness renewable energy, contributing to a greener future while also potentially increasing the value of their property.
With some technical know-how, building a solar panel at home is achievable. Constructing a solar panel begins with assembling the silicon cells in a grid pattern to form the panel's core. Next, the cells are encased within the glass casing and secured with metal framing to protect against physical damage. Wiring the cells together is the third step, establishing the electrical connections necessary to harness and transmit power. Finally, the panel is sealed and tested for efficiency.
Building DIY solar panels is a fun and rewarding experience, giving individuals the opportunity to learn about renewable energy and its potential benefits. Even without the need to build a panel yourself, understanding the step-by-step process of how solar panels are made is worthwhile for anyone interested in sustainable living and reducing their carbon footprint.
What is a solar panel?
A solar panel, also known as a photovoltaic (PV) panel, plays a crucial role in converting sunlight into electricity through the photovoltaic effect. This effect occurs naturally when semiconductor materials within the cells of the panel generate an electric current upon exposure to light. The most common semiconductor material is silicon, which is used in the main residential panel types: monocrystalline and polycrystalline panels. Other types of solar panels include PERC (Passivated Emitter and Rear Contact) and thin-film panels.
The different solar panel types differ according to materials, manufacturing processes, applications, efficiency, lifespan, and cost. Solar panels are used within photovoltaic (PV) systems in order to generate usable electricity for residential, commercial and industrial applications. The panels themselves are typically installed in outdoor locations, such as rooftops, to ensure the adequate levels of sunlight exposure required for optimal generation of solar energy. In residential settings, solar panels are commonly used to power homes and reduce electricity bills. Solar panels provide a renewable energy source that benefits both homeowners and the environment.
As an added benefit, surplus solar electricity can either be stored in batteries or sold back onto the grid through net metering. Commercially, solar panels are integrated into businesses to reduce operating costs and demonstrate a commitment to sustainability; they help companies reduce their carbon footprint and showcase corporate social responsibility. In the transport sector, solar panels are sometimes found on vehicles such as cars, buses, motorhomes, and even trains, allowing renewable energy usage for private and public transportation.
How much energy do solar panels produce per hour?
The majority of residential solar panels typically produce anywhere from 250 to 400 watts (W) per hour. A typical 250-watt solar panel generates approximately 2 kilowatt hours (kWh) of electricity in a day under optimal direct sunlight conditions. A kilowatt-hour is a unit of measurement for energy consumption, signifying the amount of energy utilized by a 1 kilowatt (kW) device running for one hour. For reference, a standard refrigerator typically uses around 4kWh over the course of a day. The effectiveness of a solar panel is optimized under peak weather conditions, typically on a sunny, cloudless day. However, solar panel output isn't static and varies according to factors like solar panel type, sun angle, time of year, and weather conditions.
What are the basic parts Solar Panels are made of?
Solar panels are made of five main components, which are silicon solar cells, glass sheets, metal frame, bus wire, and 12V wire. Silicon solar cells are the heart of the panel, converting sunlight into electricity through the photovoltaic effect. The glass sheet protects these cells from environmental elements while allowing sunlight to penetrate.
A sturdy metal frame encases and supports the entire structure, ensuring durability and longevity. The bus wire connects the solar cells together, creating a pathway for the flow of electric current. Lastly, the 12V wire facilitates the transfer of electricity from the panel to the user's application, completing the circuit for energy use. Each component plays a crucial role in the efficiency and functionality of a solar panel.
Below is more detailed information on the 5 basic parts that make up solar panels.
1. Silicon Solar Cells
Silicon solar cells are the essential building blocks of a solar panel, engineered to convert sunlight directly into electricity. They are primarily crafted from crystalline silicon, which is prized for its semiconducting properties and efficiency in capturing solar energy.
Silicon is the planet's second most plentiful element, representing around 95% of all solar modules available on the market. Crystalline silicon solar cells have a lattice structure made of interconnected silicon atoms. This design enhances a solar panel's efficiency in converting sunlight into electricity. Silicon-based solar cells strike a balance between high-performance efficiency and cost-effectiveness, coupled with an impressive lifespan. These modules retain the ability to deliver over 80% of their initial energy output after 25 years of service.
Monocrystalline and polycrystalline solar cells are two distinct types of silicon cells that differ primarily in their efficiency and manufacturing processes. Monocrystalline cells, recognizable by their uniform dark color and rounded edges, are made from single, pure silicon crystals.
This homogeneity allows electrons more freedom to move, resulting in a higher efficiency rate for energy conversion. Consequently, fewer monocrystalline cells are required to form a solar panel of a given capacity, although they are typically more expensive than their polycrystalline counterparts.
Polycrystalline cells, on the other hand, are created by melting multiple silicon fragments together, resulting in a mosaic-like, blue appearance. This structure slightly slows electron movement, leading to a lower efficiency rate. More polycrystalline cells are needed to achieve the same output as a monocrystalline panel, but their lower cost makes them an appealing option for larger installations where space is not a limitation.
Silicon solar cells are typically priced and sold per watt. Silicon cells start at $0.20 per watt in bulk, making large solar projects more cost-effective. This pricing helps consumers analyze solar panel installations easily, guiding decisions based on energy needs and finances.
2. Glass Sheet
The glass sheet in a solar panel plays an important role in protecting the solar cells and enhancing the panel's overall efficiency. A solar panel's glass sheet forms a barrier that shields the delicate internal components from environmental threats such as hail, debris, and accidental impacts while serving as an insulator against the elements.
Solar panels require flat glass, with variations like pattern glass commonly used as the front interface of crystalline modules. Conversely, float glass boasts dual functionality, acting as both substrate and back glass in the manufacturing of thin-film modules. In thin-film technology, glass doubles as the substrate layer, on which photovoltaic elements and other chemical agents, such as Transparent Conductive Oxides (TCOs), are layered.
Glass is also a foundational component for solar mirrors designed to concentrate sunlight, although the advent of new technologies may see glass being supplanted in the future.
Solar panel glass must find a delicate balance between strength and transparency. Most glasses share a similar chemical composition dominated by Silicon Oxide (SiO2), chiefly derived from sand sources. The structural integrity of the glass ensures that it withstands harsh environmental conditions. Consequently, manufacturers often employ tempered or toughened glass, which boasts a resilience several times that of standard glass, ensuring the necessary durability against these stressors across their extensive operational lifespans.
The transparency of solar panel glass is paramount for maximizing energy absorption. The glass must permit the maximum possible sunlight to penetrate through to the solar cells with minimal reflections and absorption. Typically, solar panel glass is designed to have high transparency across the visible light spectrum, which is approximately 380 to 750 nanometers. To facilitate this high level of transparency, solar glass often has a low iron content to reduce the absorption caused by iron, which is known to inhibit the flux of light reaching the solar cells.
The presence of iron impurities within the silicon oxide, primarily as iron salts, inhibits the transmission of light, thereby affecting solar efficiency. Innovations in low-iron glass involve the use of select raw materials, like low-iron sand, and necessitate higher melting points in furnace design.
Additionally, an anti-reflective coating is applied to solar panel glass, further mitigating reflection losses. This allows for improved light transmission by diminishing surface reflections and aiding in the vital task of directing more sunlight toward the solar cells. This process dramatically increases the efficiency of solar panels and optimizes their performance.
Solar panels are also subjected to the harshness of ultraviolet radiation, moisture, and chemical interaction, requiring the glass to be not only robust in structure but also resilient to these aggressive environmental factors. The glass composition and its treatment are critically designed to repel these effects while maintaining functionality over the long term. Finally, solar panel glass’s capacity to resist temperature variances without deforming or losing performance is crucial to maintaining energy yield throughout seasonal changes and various weather patterns. This impressive combination of attributes makes the glass sheet an essential, meticulously designed component of solar panels, explicitly crafted to augment durability and performance.
The price of solar panel glass reflects its diverse uses and applications. Straightforward low-iron tempered glass may be sourced for roughly $4.50 per square meter. However, the price rises considerably for better quality and more durable solar panel glass.
3. Metal Frame (typically aluminum)
The metal frame of a solar panel, typically made from aluminum, is an essential component that fortifies the structural integrity of the entire unit. A solar panel's metal frame serves multiple purposes, including providing robust protection against the elements, maintaining the panel's shape against warping, and acting as the first line of defense against physical impacts from debris such as fallen leaves or heavy snow.
Aluminum, known for its combination of strength and lightweight, is an ideal solar panel framing material. The 6063 aluminum alloy stands out with its exceptional tensile strength, ensuring that solar panels withstand considerable force without bending or breaking. This characteristic, paired with aluminum's resistance to corrosion, guarantees long-term durability even in harsh environmental conditions, an indispensable quality for solar panel installations that are designed to last for decades.
Moreover, aluminum's malleability allows for easier machining and extrusion processes, making it a cost-effective choice for solar panel manufacturers. This efficiency translates to more versatility in design and potentially lower costs for consumers. Aluminum solar panel frames are generally sold alongside mounting brackets that are imperative for safely securing solar panels, thereby providing support and stability during installation and use.
Aluminum frames often feature surface finishes like sandblasting, silver anodizing, or black anodizing. These finishes not only increase the aesthetic appeal but also provide an extra layer of durability against surface wear, further extending the lifespan of the solar panel. While there is no standardized aluminum frame size, the common thicknesses are 25mm or 35mm. This frame thickness offers a balance between robustness and minimal material use without compromising performance.
The cost of aluminum frames for solar panels typically ranges from approximately USD $2300 to $3000 per ton. However, the actual price hinges on several factors, including the manufacturer, the specifics of the frame's size and weight, and the complexity of the design. Aluminum frames are customarily not available for retail purchase due to their specialized nature. Instead, it is advised to contact solar panel parts manufacturers directly. This approach ensures a tailored solution that aligns with the unique requirements of their solar installation projects. Manufacturers will provide precise cost breakdowns and assist in determining the most cost-effective options without sacrificing the quality and integrity of the solar panels’ structural framework.
4. Bus Wire
Bus wire, sometimes referred to as buswire, buss wire, or bus ribbon, acts as the highway for electrical current generated by solar cells. Individual solar junctions produce low voltages, therefore effective series and parallel connections are needed to achieve usable energy levels. Tab wires are employed to align cells in these series, creating rows that collectively manage solar cell voltage levels. However, to harness their full solar power-generating potential, these rows must then be connected in parallel to amplify the current capability. Bus wire is used to connect these rows.
The bus wire's unique flat shape is designed to handle the increased current flow from the combined output of multiple rows of cells. To ensure efficient current transmission, the bus wire is designed with an increased thickness and width compared to the tabbing wire; its larger mass minimizes resistance along its length. Made from round copper wire, which undergoes a rigorous rolling process, bus wires are customarily coated with solder to facilitate easy and reliable soldering during solar panel assembly.
Standard bus wire thickness ranges from around 0.15mm to 0.35mm, paired with widths between 4mm and 6mm. Bus wire's greater physical size compared to tab wire allows it to manage bus currents, which are much higher than those in a single row.
Sourcing bus wire is straightforward. Buswire is available for purchase through various online marketplaces, solar technology shops, and outlets catering to DIY enthusiasts. The price for bus wire lies between $5 and $11 per kilogram, but changes according to factors like size, thickness, width, and manufacturer.
5. Standard 12V wire
A solar setup typically requires the use of a 12-gauge AWG wire. To determine the right wire size for self-built solar panels, start by assessing the amps based on the system's wattage and voltage.
Solar wire sizes are standardized using the American Wire Gauge (AWG) system, ranging from size 0000 to 26. Wires with higher gauge numbers are thicker and more resistant and are suitable for lower current applications. For most solar installations, the choice of wiring materials narrows down to either aluminum or copper. Copper wiring offers markedly higher conductivity and accommodates a more substantial current than an aluminum wire of an identical gauge. Moreover, copper's notable flexibility and heat resistance make it a popular choice for solar panel wiring.
While a 14-gauge wire may suffice for up to 15 amps, many solar panels demand higher gauge wire. The preferred wiring for a solar panel might be a 12 AWG cable, as it safely supports 20 amps with just a 2% drop in voltage. Longer solar panel cables are known to cause voltage drops, so you may need to recalculate to meet amperage needs without overheating, especially when fitting solar panels in tight spaces like on a van or small roof area.
Solar cables are crucial for solar setups and are available from trusted solar supply stores online or in physical shops. Platforms like Amazon and eBay also offer a wide range of solar wiring to meet different needs. The price of solar cables depends on both the length and the wire gauge. For example, a 50-foot 10 AWG wire used in solar energy systems usually costs around $75. Before buying cable for a DIY solar system, always make sure the cable meets your system's needs for ampacity, voltage drop, and safety.
Where can I purchase the materials for solar panels?
Solar panel materials are available for purchase via online marketplaces, in hardware stores, and directly from manufacturers. The accessibility of e-commerce platforms, such as Amazon, eBay, and AliExpress, offers convenience and a wide choice of materials, making them a popular resource for DIY solar panel builders. These marketplaces also afford the opportunity to compare prices, read customer reviews, and assess the reputability of sellers.
Additionally, for those seeking specific brands or custom requirements, it's better to buy solar panel materials and parts directly from the manufacturer. This route usually requires more detailed communication and higher costs, but it typically facilitates a better overall experience, including expert advice, customer support, and guarantees of authenticity and performance.
When buying solar panel materials, it's crucial to take into account factors like warranty, compatibility of parts, and the credibility of suppliers. This helps ensure the longevity and efficiency of DIY solar panels.
What is the production cost of solar panels?
Globally, the production cost of solar panels varies significantly due to differences in labor, manufacturing efficiencies, subsidies, and material costs. In the United States, the production cost of solar panels averages around $0.40 per watt.
Production costs for DIY solar panel construction relate to the materials needed. On average, a person looking to build their own solar panel will spend between $1.00 and $1.50 per watt. This estimation includes solar cells, glass, framing materials, and wiring. The costs don't include bulk discounts manufacturers get, showing the trade-off between DIY solar panel production and commercial-scale economies.
How to make a Solar Panel
The following steps should be taken to make a solar panel:
- Find either p-type or n-type silicon solar cells: Positive and negative-type solar cells are the building blocks of solar panels and can be purchased online or from local suppliers. A solar panel is typically made of 32, 36, 48, 60, 72 or 96 cells.
- Solder solar cells together using solder: Arrange the solar cells in a grid layout and solder them together using conductive metal strips.
- Install the back sheet covering the bottom of the solar cells: Once the cells are connected, attach a back sheet to cover the bottom layer. The back sheet serves as a protective barrier between the solar cells and the frame. Backsheet polymers like PET, PP, and PVF are often used in solar panel construction for their thermal stability, safety, and resistance to UV rays.
- Place the front glass layer: The front glass layer is the top layer of the solar panel that serves as protection from external elements. Solar panel glass should be tempered and non-reflective to ensure maximum sunlight absorption.
- Seal a metal frame: After placing the glass layer on the solar cells, seal the metal frame. A solar panel's metal frame is typically made from aluminum and holds all the components of the solar panel together while providing structural support.
- Install a junction box: A junction box is where the solar panel's wiring connects to, and it also provides a protective casing for the electrical components. The junction box is the last component to be installed prior to testing your solar panel.
- Test Solar Panel: After assembling your solar panel, it's important to test its performance before installing it. A multimeter is used to measure the voltage and current output of the solar panel.
1. Buy solar silicon cells that are either p-type or n-type
The initial step in constructing a solar panel is to obtain silicon cells, which are the fundamental building blocks that convert sunlight into electrical energy.
Firstly, decide which type of silicon cells you require. Silicon cells come in two types: p-type (positively charged) and n-type (negatively charged). P-type cells are doped with elements such as boron to create 'holes' or positive charge carriers, whereas n-type cells use phosphorus or arsenic to add extra electrons, resulting in negative charge carriers.
The choice between p-type and n-type cells affects the panel's efficiency, cost, and long-term performance. N-type cells, though generally more expensive, offer higher efficiency and better performance in high-temperature conditions compared to p-type cells. N-type solar panels achieve an efficiency of 25.7%, surpassing the 23.6% efficiency of P-type panels. When selecting cells, it's vital to consider the balance between budget constraints and the desired efficiency of the DIY solar panel project.
Secondly, purchase silicon cells from reputable suppliers or manufacturers. Solar silicon cells are able to be purchased locally from various suppliers, including manufacturers' websites and specialist solar retailers. One of the most affordable options for buying silicon cells is through an online marketplace, Alibaba or AliExpress, given that most solar cells are manufactured in China.
However, ensure that you only purchase from reputable vendors. It’s a good idea to check the company name, website, contact details, and reviews before making a purchase.
2. Create Solar Panels by joining solar cells together using solder
Once your silicon solar cells are prepared, it's time to solder them together using bus wire. Bus wire is a type of cable, usually made from copper, which enables electrical current to flow between solar cells. Generally, 60 or 72 solar cells are enough to build one panel.
Start by placing the solar cells in the desired arrangement, series or parallel. Choosing a series arrangement for your solar panel increases its output voltage, whilst a parallel arrangement increases its current. The solar cells should be placed flat on a clean surface, with the front side facing down.
Then, apply a small amount of soldering flux to the bus wire or tab ribbon. Soldering flux is essential for preparing the ribbon by removing any oxidation, ensuring that it adheres flawlessly to the solar cell. Typically, a soldering iron rated between 90 to 130 watts is used for soldering solar cells.
This wattage is powerful enough to quickly melt the solder without damaging the delicate cells. When soldering the back of solar cells, the metal layer is very thin and can dissolve in solder. To avoid issues, add a little more solder to the tab wire, then flux the cell backside. Lay the flat tab wire on the backside, and gently drag your hot iron down the tab wire to reflow onto the cell. Lead-containing solder is easier to use and melts faster than lead-free solder, which is mainly used due to toxicity concerns.
Cleaning the cell surface with alcohol or a brush can improve adhesion. Make sure the size of the soldering tip is compatible with the width of the tab ribbon. It’s important to avoid using an overly large soldering tip as it could distribute excessive heat and damage the cell.
Always immerse the tab ribbons in a bath of soldering flux before initiating the soldering process. This treatment cleanses any oxide layer that may impede the soldering efficiency. When executing the soldering, set your iron temperature according to the solder's melting point. Generally, a particularly high heat is not required for soldering solar cells, which is why a “lead-free” soldering flux is not typically necessary, as the temperature is not high enough to cause issues with toxicity. Remember, the solder must melt rapidly, and you need to attach the ribbons to the cells concisely and quickly to avoid heat damage to solar cells.
3. Install the backsheet that covers the bottom of the solar cells
The installation of the back sheet is a critical step in assembling a solar panel as it ensures optimal protection and longevity for the solar cells.
Begin by selecting the appropriate back sheet material. Commonly used back sheet polymers include PET, PP, and PVF, each offering different degrees of thermal stability, safety, and UV resistance. The color of the backsheet is typically white, which reflects heat and improves efficiency, although alternatives such as clear or black are also available..
Then, prepare the back sheet by cutting it precisely to the size of the solar panel frame. Following this, carefully align the back sheet to the rear side of the arranged solar cells. Always ensure that the back sheet lies flat and even allows for a secure attachment.
Next, an adhesive substance that is compatible with both the back sheet material and the solar cells is applied to affix them securely together. The choice of adhesive needs to provide a strong bond, resisting moisture ingress and potential delamination over time.
Once the adhesive is applied, press the back sheet uniformly against the cells, taking care not to apply excessive force, as this might compromise the cell integrity. Finally, allow the adhesive to cure as per the manufacturer instructions, ensuring that the backsheet forms a robust, impermeable barrier that caters to mechanical protection and electrical insulation of the solar panel.
4. Place the front glass layer
Start by cleaning the front glass to eliminate any contaminants that could obscure sunlight or weaken the bond to the solar cells. A mild detergent mixed with water is recommended for thorough cleansing. After cleaning, proceed to measure and mark the glass to match the precise dimensions of your solar panel design, using a ruler and marker to outline exact measurements. Carefully score the glass along these lines with a glass cutter or a diamond-tipped blade, exerting consistent pressure to ensure a neat separation.
Following the scoring process, gently sand the cut edges to remove any sharp remnants. This helps reduce the risk of injury during subsequent handling. With the solar cells already linked together, it is now time to attach them to the newly prepared glass surface. First, construct a sturdy frame from aluminum.
This structure will serve to both stabilize and shelter the solar cells. Second, gently position the glass onto the frame, checking that it fits well and is tightly secured. It is essential to ensure that the solar cells are oriented upwards and unobstructed by the frame for optimal exposure to sunlight, maximizing the efficiency of solar energy conversion.
5. Seal the metal frame
After assembling the solar cells and front glass within the aluminum frame, it's time to properly seal the structure. Begin by applying a silicone sealant around the perimeter of the frame, ensuring complete coverage to create a weatherproof seal. Press down on the glass gently to evenly distribute the sealant, and wipe away any excess to maintain a clean, professional appearance.
Finally, the sealant must be fully cured as per the product specifications, usually between 24 to 48 hours, to establish a durable bond that is resistant to environmental stressors. This sealing process is crucial for the longevity and performance of the solar panel.
6. Install a junction box
To integrate a junction box into your self-built solar panel, start by selecting an appropriate location on the backside of the panel where it can be fixed unobtrusively. Begin by mapping the positioning, ensuring that it aligns accurately over the solar cells' connections. Securely fasten the solar panel junction box in place using screws or an adhesive suitable for outdoor use while being careful not to penetrate too deeply and damage the underlying cells. Next, connect the panel's positive and negative terminals to the corresponding terminals in the junction box, typically designated by color or signage. Installing a junction box is crucial for creating an organized passage for the electrical current collected by the solar cells.
7. Test the Solar Panel
Before testing the solar panel, ensure your solar panel is fully assembled, and the sealant is fully set. Start by positioning the panel under direct sunlight, ensuring unobstructed exposure, to evaluate its peak performance capacity. Using a multimeter, meticulously measure the voltage and current produced from the solar panel's junction box.
Connect the meter's positive and negative leads to the corresponding terminals, being careful to avoid electrical shocks. Record the readings and compare them with the specified output values to verify the panel's operational efficacy. It is essential to conduct this test under varying light conditions to assess the solar panel's energy output stability comprehensively.
During the solar panel testing process, be very careful with the electrical components. Always handle with protective equipment and never touch the terminals with bare hands to prevent the risk of electrical shock, which can be not only harmful but potentially fatal.
Can I make my own solar panel?
Yes, you can make your own solar panel, but it is crucial to follow safety precautions to mitigate any risks associated with the construction and installation process. Constructing a functioning solar panel involves handling delicate materials and dealing with electrical components, which poses potential hazards if not managed correctly.
Before constructing a solar panel, ensure you have a clear understanding of electrical principles and are comfortable working with wiring and soldering. Always use proper safety gear, including gloves to protect your hands from sharp edges and safety glasses to shield your eyes from any soldering splatter or glass shards. Work in a well-ventilated area to avoid the accumulation of fumes from soldering and sealing materials. Additionally, be cautious when handling solar cells as they are fragile and can break easily, possibly leading to injury.
Before connecting the solar panel to a power inverter or battery storage, it's highly advised to consult with a professional electrician. Improper wiring can lead not only to a malfunctioning solar panel but also to electrical fires or electrocution. Finally, during installation, secure the panel firmly to prevent any accidents that could stem from the panel falling due to improper mounting.
DIY solar panel kits are also available to buy, containing all the components needed to build a solar panel at home. These kits range from around $600 to $1400, depending on the brand and wattage.
Is it hard to make a solar panel?
Generally, yes, building a solar panel requires expertise in electrical and technical knowledge for safe and effective construction. Assembling solar panels at home with precise instructions and expert advice is possible but is generally not worth it, considering the amount of effort and expertise required. For this reason, we highly recommend purchasing commercially completed panels.
Purchasing ready-built solar panels mitigates any health and safety risks associated with the DIY process and generally saves time and money, considering mass solar manufacturing in the modern day. The cost of solar panels has decreased substantially in recent years, now averaging approximately $2.86 per watt before accounting for national incentives, making the purchase of pre-made panels a cost-effective and safer investment.
Are the materials for solar panels expensive?
The costs associated with solar panel materials are generally very high, especially when it comes to raw materials like silicon, aluminum, and copper, which require extensive mining, processing, and refining to be used in solar panels. However, solar panel parts have dramatically reduced in price over the last 30 years due to economies of scale, where mass production has brought down the overall costs involved with solar panel materials.
Purchasing solar panel components in bulk quantities typically results in a lower per-unit cost, offering significant savings over time, whereas buying materials for a small-scale project is considerably more costly. The size of the system you intend to build will directly influence the quantity of materials needed, and smaller quantities generally translate to a higher upfront cost.
Which companies manufacture Solar Panels?
Below are the top five best solar panel manufacturers in the U.S., ordered by volume of production.
- First Solar: Highly regarded for their advanced thin-film solar panels and a global leader in photovoltaic (PV) solar energy solutions. First solar currently boast a manufacturing capacity of 2.4GW.
- Qcells: Offers a wide range of high-efficiency solar modules and is known for its rigorous quality control and testing procedures. Qcells' manufacturing capacity currently lies at an impressive 1.7GW.
- Silfab Solar: Specializes in automated manufacturing of monocrystalline solar panels, emphasizing reliability and superior performance. The manufacturing capacity of Silfab solar is currently 800MW.
- Jinko Solar: One of the world's largest solar panel manufacturers, focusing on delivering solar products for residential, commercial, and utility-scale projects. Jinko Solar currently offera manufacturing capacity of 400MW.
- Mission Solar: Dedicated to producing solar modules with high power output and long-term reliability, engineered and assembled in the USA. Mission Solar's manufacturing capacity is currently 300MW.